How I freed a pool heat pump from an unencrypted Chinese cloud server
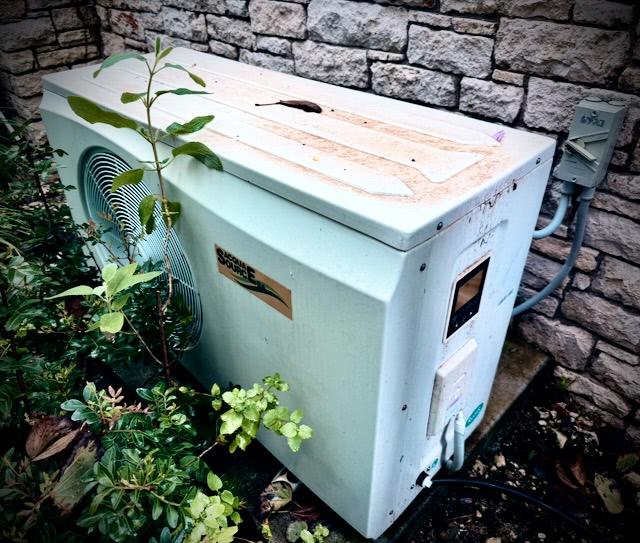
I have a pre-installed pool heat pump - an “AcquaSource” branded unit, the kind you can buy at any pool store in Europe - which supports WiFi. The App called “Pool Panel” wasn’t pretty, but it worked and I didn’t give it much thought. At one time, the remote control of the pump stopped responding: The pump itself was fine; the panel worked, the temperature held. So I decided to take a deeper look at how it all works. It turned out to be a security nightmare.
As icing on the cake: Their iOS app “Pool panel” by the developer “Guangzhou Wo Jie Information Technology Co., Ltd” is unmaintained since 2019, the contact link leads to a broken link (https://www.axen-heatpump.com/contactus.html), nobody responded via email. Very trustworthy.
This is the story of how I got control back, learned a few uncomfortable things along the way, and ended up with a small Docker container that exposes my pool pump as a clean local REST API.
tl;dr: Show me the code!
Disclaimer: if you try any of this at home, you’re on your own. I’m describing what I did with my own device on my own network. If you break your device, that’s on you. Also: Don’t poke at devices that aren’t yours.
The first uncomfortable thing
Before doing anything clever, I sniffed the pump’s network traffic with tcpdump. The pump has a Wi-Fi module (a Hi-Flying HF-LPB130 - keep that part in mind, we’ll come back to that later) and dials out to the internet on its own. What I saw:
- TCP, port 502. That’s the standard Modbus port.
- Plain text, no TLS. Everything in the clear, unencrypted.
- Destination:
47.254.152.109- an Alibaba Cloud IP in mainland China. Reverse-DNS:fzdbiology.com.
So that means, if you can sniff the communication between the pump or the mobile in any way, you can remote control any pump. Set it to 40 degrees on boost most in the middle of the winter for example. So, not good.
There’s also an HTTP API at fzdbiology.com:8080 (also unencrypted, plain HTTP - not HTTPS) that the iOS app uses for login and “give me the current state of my pump”. When I pointed a browser there, I got a Java-style admin panel where I could see my own device, my email address, and a couple of numbers I half-recognized. In Chinese only. :-/
It also seemed to me that the device-side protocol on :502 is identified by MAC address only. There’s no token, no certificate, no per-device shared secret that I could see. If you know a device’s MAC, the cloud appears to forward control commands to whoever’s currently connected as that MAC. I didn’t actually try connecting as someone else’s pump, but clearly security hasn’t been any concern when designing this.
I’m sure with more time you could connect as someone else’s pump and watch what their iOS app sends — set their pool to 40 °C, flip them into boost mode at 03:00. I didn’t try, but the surface area is right there.
Additionally, I wanted to gain more control - for example that the pump shouldn’t heat overnight and only start heating if it makes sense in terms of outside temperature.
So I decided to cut the cord to this unencrypted, weird Chinese server, which was constantly chatting with the heat pump.
Recognising a white-label
I expected to be on my own with this. AcquaSource sells under several brand names (just google “47.254.152.109”, you’ll find brands like “Mundoclima”, “Thermway”, “Powerpool”, Proteam”, “AES” and more all around the world); the manuals are translations of translations.
When you try to connect the pump, it starts a wifi called HF-LPB130. This seems to be a common SOC module when it comes to heat pumps of any kind. Fortunately, some other people already did some research on that already:
-
s10l/deye-logger-at-cmd- solar inverter loggers using the same module, with documentedAT+commands for changing the cloud server. -
Hypfer/deye-microinverter-cloud-free- exactly the same idea I was about to attempt, but for solar inverters: redirect the module from the vendor cloud to your own server. -
davidrapan/ha-solarman- a Home Assistant integration for the same family of devices.
Big shoutout to those repo owners and the work they put into reverse-engineering!
The HF-LPB130 turns out to be a generic Wi-Fi-to-Modbus bridge. The vendors all use it the same way: the device speaks Modbus over a serial UART; the module re-frames it as Modbus-TCP-style MBAP packets and dials a hard-coded server. Anyone who buys this module in volume gets the same primitive: a serial-to-cloud pipe that you can re-target with a few AT+ commands over UDP/48899.
That meant two things: (1) I could get the module to talk to my server instead of fzdbiology.com, and (2) once it did, I’d be receiving Modbus-TCP-shaped frames - a known protocol with widely available parsers, plus a vendor-specific extension for heartbeats.
What I didn’t have was the pump-vendor-specific bit: which Modbus register holds the on/off bit, which one holds the setpoint, what the function codes mean.
Phase 1: cheating with mitmproxy
Before doing the hard reverse-engineering work, I did the easy reverse-engineering work. I pointed my iPhone at a mitmproxy instance on my laptop, opened the iOS app, and watched it log into fzdbiology.com:8080.
The HTTP API is verbose: getRtuRealTime returns a JSON document with about 100 named fields per device - model, function, heattemp, cooltemp, pa10, pa15, ap2, ap3, pb11. Some are obviously meaningful; some are just opaque registers. I wrote a small Ruby tool (tools/cloud_probe.rb in the repo) that wraps loginUser + getRtuRealTime and dumps a snapshot to disk. Two snapshots, taken on either side of pressing a button on the pump’s physical panel, told me what each field represented:
$ ruby tools/cloud_probe.rb diff before.json after.json
model: 4 → 2          # ← I pressed "heat mode"
heattemp: 27 → 28     # ← I bumped the setpoint
That gave me the vocabulary. It did not give me the protocol - the cloud was translating between the iOS app’s verbs and the device’s Modbus registers, and I needed to know how that translation worked if I was going to replace the cloud.
I then also decompiled the Android app, which basically gave me the same findings I already had from sniffing with mitmproxy.
Phase 2: I/O digging
I had two options: keep poking at the device passively, or impersonate the cloud and let the device tell me what it wanted to hear. I did both.
Passive sniffer. A small Ruby script that listens on TCP/502, parses Modbus-TCP framing, ACKs every push the device makes, and logs the bytes with timestamps. Nothing the device sends gets dropped, and once you ACK its first vendor heartbeat, it sends a full register sweep every couple of seconds.
Active cloud-impersonator. Another small script that does the opposite: opens a TCP connection to fzdbiology.com:502, sends the heartbeat the real device would send (using my own pump’s MAC, since the cloud only auths by MAC), and waits for what comes back. With the iOS app running, it turned out that every button I pressed in the app turned into a 12-byte frame on my impersonator’s socket. I could line up “I just pressed boost” against fc=0x06 addr=0x07d2 value=0x0400 and conclude that register 0x07d2 is the function selector and 0x0400 means “boost”.
Forty minutes of button-pressing later, I had the user-facing control surface decoded:
| addr | meaning | values |
|---|---|---|
| 2000 | mode |
0x01 = auto, 0x02 = cool, 0x04 = heat |
| 2001 | on/off | 0 / 1 |
| 2002 | function |
0x0000 = smart, 0x0010 = silent, 0x0400 = boost |
| 2006 | setpoint | integer °C, range 8–40 |
Modes and functions are bit-encoded - 0x04 for heat is bit 2; silent (0x0010) is bit 4 and boost (0x0400) is bit 10 in the same word, with smart represented by no bits set at all. The earlier hypothesized mapping I’d seen in other projects (auto=0, silent=1, boost=3) was an enum guess; the device actually wants flag bits.
I did the second phase with Claude Code as a pair, which kept the test suite green while I stress-tested protocol theories at the keyboard - which was extraordinarily helpful, especially when it came to observing bits and registers.
Phase 3: a Docker container that speaks pool
The end product is small: a single Ruby process that listens on two ports inside a Docker container plus a couple of scripts which help to set up the initial configuration to point the pump to my local network.
- Port 502 - the real pump dials in here. The container parses Modbus-TCP pushes, maintains an in-memory register snapshot, and sends Modbus writes back when something on the local network asks for a control change.
- Port 8090 - a flat REST API for everyone else.
$ curl http://homeserver.example.com:8090/
{
  "SWITCHED_ON": 1,
  "TEMP_TARGET": 28,
  "TEMP_AMBIENT": 17,
  "TEMP_OUTLET": 18,
  "BOOST": 1,
  "SILENCE": 0,
  "STATUS_MODE": 2,
  "STATUS_MALFUNC": "none",
  ...
}

$ curl -X POST -d "settemp 28" http://homeserver.example.com:8090/
{ "result": "ok", "verb": "settemp 28", "snapshot": { ... } }
End-to-end latency from curl to physical pump is well under a second. The container sends the Modbus write, the pump echoes the same frame back over TCP within ~150 ms, and the HTTP request resolves at that moment. The full register-block sweep runs every ~17 s in the background and updates the snapshot, but commands don’t have to wait for it.
One thing I noticed is that the HF-LPB130 only accepts hostnames, not IP addresses. So you need to have some public domain which resolves into your 192.168.x.x address
Phase 4: Deploying it
The whole thing runs on a Raspberry Pi 4. The Pi has a stable LAN IP, an A-record at homeserver.example.com pointing at it, and docker compose up -d --build brings the container up at boot. The pump’s Wi-Fi module is configured (one-time, via the OEM AT+ command set) to dial homeserver.example.com:502 instead of the Chinese cloud. If I ever move the container to a different host, I just flip the DNS A-record - the module re-resolves on its next reconnect and lands on the new server. No more touching the pump.
Integrating it into smart home systems
Within Homey Pro I created a virtual device that represents the pump, plus a HomeyScript that runs every five minutes (or whenever the virtual device’s state changes). The script implements a soft-intent model: turning on the virtual device doesn’t directly turn on the pump — it only fires up if the outside temperature (measured by a Netatmo sensor) is above a sensible threshold and we’re inside a daytime heating window.
Reading the manual carefully, I also learned that the pump’s “silent” mode isn’t just acoustically quieter — it’s actually the most energy-efficient setting. So the script pins the pump to silent by default and only flips to “boost” when I explicitly ask for fast heating via a separate Boost button on the virtual device.
If you have the same pump, the same module, or just the same general “I want my IoT thing to stop calling home” problem, the code is on GitHub.
I hope it’s useful for somebody with the same problem.